Updated 2026-07-11
Gauntlet Gallery's institutional standard for truthful object photography, video, condition documentation, scale, staging, web presentation and archival media.
How We Photograph, Film, Stage and Present Art, Memorabilia and Collectible Objects
Institutional document: GG-004
Updated: July 11, 2026
This institutional standard is published by Gauntlet Gallery. It is part of the The Gauntlet Curatorial Philosophy, The Gauntlet Research Methodology, The Gauntlet Cataloging Standard, Gauntlet Photography and Presentation Standards, The Gauntlet Authentication Framework, The Gauntlet Historical Preservation Policy, The Gauntlet Collector Experience and The Gauntlet Field Exhibition Philosophy series.
Introduction

Presentation is evidence.
The way an object is photographed, filmed, framed, described and displayed affects whether a collector can understand what they are considering.
Poor presentation creates uncertainty.
Overly polished presentation can create a different problem: it may make an object appear cleaner, larger, brighter or more important than it is.
Gauntlet Gallery’s objective is neither to underpresent nor to manipulate.
Our objective is to reveal.
A strong presentation should allow a collector to understand:
- what the object looks like,
- how large it is,
- how materials respond to light,
- where signatures and identifiers appear,
- what documentation accompanies it,
- what condition issues exist,
- how it may look when displayed,
- and how the physical object differs from a flat online image.
This is particularly important in online collecting.
A collector may make a substantial purchase without holding the object, seeing it under natural light or inspecting its reverse. Photography and video become part of the evidence supporting the transaction.
For that reason, Gauntlet treats visual documentation as a curatorial, cataloging and trust function—not merely a marketing function.
The presentation should make an excellent object more understandable.
It should not make an ordinary object look exceptional through distortion.
It should not hide flaws.
It should not use lifestyle staging to substitute for actual documentation.
It should not separate a certificate from the object it supports.
And it should not leave the collector guessing about scale, surface or condition.
This standard applies across:
- works on paper,
- paintings,
- framed art,
- designer figures,
- sculptures,
- signed guitars,
- photographs,
- records and albums,
- historical artifacts,
- space memorabilia,
- certificates,
- packaging,
- and multi-object sets.
Different objects require different methods, but the underlying principles remain consistent:
- represent the actual object,
- preserve color and proportion,
- show identifying details,
- disclose condition,
- communicate scale,
- separate documentation from decoration,
- and retain original visual records.
1. The Purpose of Photography

Object photography at Gauntlet serves four distinct purposes.
Identification
The images must identify the exact object.
This includes:
- front,
- reverse,
- markings,
- signature,
- edition number,
- certificate,
- packaging,
- serial number,
- and distinguishing condition characteristics.
Evaluation
The images must allow a collector to assess:
- condition,
- visual quality,
- completeness,
- presentation,
- and whether the object fits their collection.
Interpretation
The images should help explain:
- materials,
- production method,
- scale,
- historical details,
- and the object’s relationship to a broader story.
Promotion
The images may also attract attention and communicate the object’s visual power.
Promotion is legitimate.
It simply cannot override identification, evaluation or disclosure.
The commercial image should be the most compelling truthful representation of the object—not a replacement for documentary photography.
2. The Core Visual Principle: Reveal, Do Not Manufacture

Gauntlet’s photography standard begins with one rule:
The image should increase understanding of the object without materially changing the object’s appearance.
Acceptable photographic improvement includes:
- correct exposure,
- accurate white balance,
- perspective correction,
- cropping,
- rotation,
- lens correction,
- removal of dust from the background,
- and minor tonal adjustment needed to match the actual object.
Unacceptable alteration includes:
- removing creases,
- repairing corners digitally,
- brightening faded signatures beyond their real appearance,
- deepening colors to create artificial saturation,
- reconstructing missing paint,
- replacing damaged packaging,
- eliminating scratches,
- altering edition numbers,
- changing frame color,
- sharpening a blurred signature to imply clarity that does not exist,
- or compositing documentation that does not belong to the object.
A collector should not receive an object and discover that the photography functioned as cosmetic restoration.
The online presentation should remain faithful to the physical reality.
3. Item-Specific Photography

Gauntlet prioritizes photography of the actual object being offered.
This is especially important for:
- unique works,
- hand-finished editions,
- signed objects,
- pre-owned figures,
- framed works,
- condition-sensitive pieces,
- artist proofs,
- vintage memorabilia,
- and historical artifacts.
When Stock Photography Is Acceptable
Stock or manufacturer imagery may be used to supplement object-specific images when:
- the item remains factory sealed,
- the official image helps show the intended assembled appearance,
- packaging prevents a complete view,
- or the image provides useful release context.
Stock photography should be labeled clearly.
It should never replace photographs of:
- the actual packaging,
- the actual seal,
- visible condition,
- actual authentication,
- or item-specific identifiers.
Representative Images
Where multiple materially identical new objects are offered, representative imagery may be used only when:
- the listing clearly states this,
- condition is substantially uniform,
- no unique signature or edition number is involved,
- and the customer will not reasonably expect to receive the exact photographed example.
For signed, numbered or used objects, the actual item should be shown.
4. The Standard Image Sequence

Every object should be photographed in a logical sequence.
The exact number of images varies, but the presentation should generally move from overall form to documentary detail.
Image 1: Hero View
The first image should communicate the object clearly and immediately.
It should show:
- the complete object,
- correct orientation,
- accurate proportions,
- and minimal visual distraction.
The hero image may be photographed against:
- a clean neutral background,
- an appropriate architectural setting,
- or a controlled display environment.
The background should support the object without competing with it.
Image 2: Alternate Full View
A second overall view should provide a useful variation.
For flat works, this may be a slightly angled view showing surface and frame depth.
For figures, it may be a three-quarter angle.
For guitars, it may be the full reverse.
For artifacts, it may show the opposite side or complete assembly.
Image 3: Reverse
The reverse can contain critical evidence:
- labels,
- signatures,
- mounting,
- publisher stamps,
- frame construction,
- serial numbers,
- condition,
- or provenance markings.
Where the reverse cannot be safely viewed, that limitation should be stated.
Images 4–6: Side, Edge or Profile Views
These images communicate:
- depth,
- edge condition,
- construction,
- thickness,
- sculptural form,
- and frame profile.
Detail Images
Detail photographs should include, where applicable:
- signature,
- edition number,
- inscription,
- blind stamp,
- publisher mark,
- manufacturer mark,
- copyright line,
- serial number,
- certification label,
- materials,
- surface texture,
- hardware,
- or production details.
Condition Images
Each material flaw should be photographed directly.
Documentation Images
Certificates, invoices, labels and authentication cards should be shown separately and legibly.
Scale and Display Images
At least one image should help the collector understand how the object occupies space.
5. Camera and Capture Standards

Professional results do not depend solely on expensive equipment.
Consistency, lighting and controlled technique matter more.
Resolution
Images should be captured at a resolution sufficient for:
- enlargement,
- detailed inspection,
- archival preservation,
- and future publishing.
Original full-resolution files should be retained even when ecommerce versions are compressed.
File Format
Recommended capture formats include:
- RAW for primary photography,
- high-quality JPEG for processed delivery,
- TIFF where archival or publication needs justify it.
RAW files preserve:
- exposure latitude,
- color data,
- and the ability to revisit processing without degrading the original.
Lens Selection
Lens choice should minimize distortion.
For many objects, a normal-to-short-telephoto focal length is preferable.
Wide-angle lenses can distort:
- frames,
- guitar bodies,
- figures,
- and object proportions.
Macro or close-focus lenses may be used for:
- signatures,
- texture,
- paper surface,
- print dots,
- labels,
- and condition details.
Tripod Use
A tripod improves:
- sharpness,
- repeatability,
- alignment,
- and consistent framing.
It is especially valuable for flat art, reflective objects and video.
Camera Alignment
For flat works, the camera sensor should be parallel to the artwork surface.
Misalignment can create:
- trapezoidal distortion,
- uneven focus,
- and misleading proportions.
Perspective correction may be applied when needed, but correct capture is preferable to aggressive correction later.
6. Lighting Standards

Lighting should reveal material, color and condition.
It should not create drama at the cost of accuracy.
General Lighting
A balanced two-light setup positioned at approximately 45-degree angles is effective for many flat works.
This helps reduce:
- glare,
- strong shadows,
- and uneven brightness.
Diffusion
Diffused light is generally preferred for:
- prints,
- photographs,
- framed works,
- packaging,
- glossy figures,
- and signed surfaces.
Diffusion helps create softer reflections and more even color.
Raking Light
Raking light is intentionally placed at a shallow angle across the surface.
It is useful for revealing:
- creases,
- dents,
- cockling,
- embossing,
- paper texture,
- scratches,
- surface impressions,
- and paint variation.
Raking-light images should be included when they reveal condition that is difficult to see under normal lighting.
They should not replace normal presentation images.
Polarization
A circular polarizing filter can reduce glare from:
- glass,
- glossy print surfaces,
- varnish,
- vinyl figures,
- and lacquered guitars.
Cross-polarized lighting may be used for highly reflective work, though care must be taken not to flatten all surface character.
Mixed Light
Mixed color temperatures should be avoided.
Combining daylight, warm household bulbs and cool LED lighting can create inaccurate colors that are difficult to correct.
Natural Light
Natural light may be useful for supplemental images but should be controlled.
Direct sunlight can:
- create harsh contrast,
- alter perceived color,
- and risk damage to sensitive works.
7. Color Accuracy

Color is one of the most difficult aspects of online representation.
Screens vary.
Ambient light varies.
Photography and processing can shift color.
Gauntlet’s responsibility is to minimize avoidable distortion.
White Balance
White balance should be established using:
- a neutral gray card,
- color reference target,
- calibrated lighting,
- or a reliable manual setting.
Automatic white balance may vary between images and should not be relied upon without review.
Color Reference
For important or color-sensitive objects, an archival reference image should include a color target.
This image does not necessarily need to appear publicly, but it should remain in the internal record.
Monitor Calibration
Primary editing should be performed on a calibrated or reasonably accurate display.
A highly saturated consumer screen can cause under-editing or overcorrection.
Color Disclaimer
Public listings may note that:
Color can vary slightly across screens and lighting environments.
This disclaimer does not excuse poor color management.
It simply acknowledges the limitations of digital display.
Metallic and Fluorescent Colors
Metallic, fluorescent, iridescent and reflective finishes are especially difficult to represent.
For these objects, include:
- straight-on images,
- angled images,
- video,
- and close-up detail.
This helps show how the surface changes under light.
8. Background and Styling

Background choice affects perceived quality.
It also affects accuracy.
Neutral Backgrounds
Neutral white, gray or understated backgrounds are preferred for documentary images.
They provide:
- clarity,
- consistent color comparison,
- and fewer distractions.
Dark Backgrounds
Dark backgrounds may be appropriate for:
- reflective metal,
- light-colored sculptures,
- or dramatic editorial photography.
They should not obscure the edges of the object.
Environmental Settings
Environmental or lifestyle images can help communicate:
- scale,
- mood,
- placement,
- and collector experience.
These images should remain secondary to the documentary image set.
Props
Props should be used sparingly.
They may provide:
- scale,
- cultural context,
- or display inspiration.
They should not imply that unrelated items are included.
Visual Consistency
Across the site, the photography should feel related.
Consistency may include:
- similar framing,
- controlled backgrounds,
- repeatable lighting,
- clear margins,
- and predictable image sequence.
Consistency helps the gallery feel intentional rather than assembled from unrelated seller photographs.
9. Photography of Works on Paper

Works on paper require careful handling and alignment.
Unframed Works
When safe, photograph:
- full front,
- full reverse,
- all four corners,
- all four edges,
- signature,
- edition number,
- marks,
- and condition details.
The work should be supported on a clean, non-abrasive surface.
Handling
Use clean dry hands or appropriate gloves depending on the material.
Avoid:
- dragging paper,
- placing weights directly on the image,
- adhesive tape,
- metal clips,
- or dirty work surfaces.
Flattening
A work should not be aggressively flattened solely for photography.
Temporary weights may cause damage.
If the sheet naturally waves or curls, the photography should show this honestly.
Margins and Edges
Do not crop the photograph so tightly that margins, deckled edges or corner condition disappear.
Texture and Embossing
Use angled light to show:
- screen-print texture,
- letterpress impression,
- embossing,
- hand-finishing,
- and paper surface.
Reverse Documentation
The reverse may reveal:
- staining,
- hinges,
- tape,
- inscriptions,
- stamps,
- and condition not visible from the front.
10. Photography of Framed Art

Framed art presents additional challenges.
Glass and Glare
Use:
- diffused lighting,
- polarization,
- dark-room control,
- or careful camera placement
to reduce reflections.
The photographer should not be visible in the glazing.
Frame Documentation
Show:
- complete front,
- frame corners,
- frame depth,
- reverse,
- hanging hardware,
- labels,
- backing,
- and visible damage.
Artwork Versus Frame
The image set should distinguish the condition of:
- the artwork,
- the glazing,
- the mat,
- and the frame.
Unexamined Areas
When the artwork has not been removed from the frame, the listing should state that:
- the complete sheet,
- reverse,
- and mounting method were not inspected.
Photography must not imply otherwise.
Installation Views
Framed works benefit from environmental images showing:
- wall placement,
- scale,
- and overall presentation.
When the installation is digitally simulated, it must be labeled.
11. Photography of Figures and Sculpture

Three-dimensional objects require coverage from multiple angles.
Required Views
Depending on form, include:
- front,
- rear,
- left profile,
- right profile,
- three-quarter front,
- three-quarter rear,
- top,
- base,
- and underside.
Surface Detail
Photograph:
- paint edges,
- joints,
- molded marks,
- material texture,
- factory stamps,
- and hand-finished areas.
Condition
Use directional light to show:
- scratches,
- scuffs,
- paint transfer,
- cracks,
- fading,
- chips,
- and surface inconsistencies.
Stability
The object should be photographed on a stable surface.
Supports used for photography should not create stress or damage.
Transparent Objects
Transparent or translucent objects may require:
- backlighting,
- dark-background images,
- side lighting,
- and video.
Reflective Objects
Chrome, glass and polished surfaces reflect the room.
Use:
- large diffusion panels,
- controlled black and white cards,
- and careful camera placement.
The goal is to define form without creating distracting reflections.
12. Photography of Signed Guitars

Signed guitars combine:
- object photography,
- signature documentation,
- instrument documentation,
- and display presentation.
Full Instrument Views
Include:
- complete front,
- complete back,
- headstock,
- neck,
- body,
- bridge,
- controls,
- and case when included.
Signature Documentation
Show:
- full signature,
- close-up,
- location relative to the guitar,
- marker color,
- and authentication label.
Serial Number
Photograph the instrument serial number clearly.
Brand and Model
Show:
- headstock logo,
- model identifiers,
- manufacturer labels,
- and relevant hardware.
Condition
Document:
- body scratches,
- dents,
- finish wear,
- hardware condition,
- string condition,
- neck condition,
- and signature fading or smearing.
Display Presentation
A signed guitar may be shown:
- in a case,
- on a wall mount,
- on a stand,
- or with accompanying photographs.
The display image should not imply that the guitar was played, owned or used by the signer unless separately documented.
Functional Status
Photography cannot prove playability.
The listing must separately state whether:
- electronics were tested,
- the neck was inspected,
- the instrument was professionally set up,
- or it is offered primarily as a display collectible.
13. Photography of Autographs and Signed Photographs

Autograph photography should preserve both the signature and the underlying image.
Angle and Reflection
Metallic markers and glossy photographs may require multiple angles.
A signature can appear bright, dark or invisible depending on the light.
Include at least one image showing the signature clearly.
Ink Condition
Document:
- fading,
- skipping,
- smudging,
- bleeding,
- surface abrasion,
- and contrast against the background.
Full Object
Do not present only a signature close-up.
The collector must see:
- the complete photograph,
- signature placement,
- margins,
- and overall condition.
Authentication Relationship
Show the authentication label in relation to the object.
If the label is on the reverse, show both the reverse label and the front object.
Encapsulated Objects
For encapsulated items, photograph:
- full front,
- full reverse,
- label,
- certification number,
- and any scratches or damage to the holder.
The condition of the holder should be distinguished from the condition of the object.
14. Photography of Space and Historical Artifacts

Historical artifacts require documentary clarity.
Complete Object Coverage
Show the object from all meaningful sides.
Marks and Numbers
Capture:
- serial numbers,
- part numbers,
- mission marks,
- manufacturer labels,
- contractor tags,
- ownership labels,
- and inscriptions.
Provenance Documents
Photograph relevant documents separately.
The collector should be able to determine:
- what each document is,
- whether it appears original,
- and how it relates to the object.
Scale
Historical components can be difficult to judge online.
Include:
- ruler,
- hand reference,
- display view,
- or clearly stated dimensions.
Wear
Wear may support historical character but should not be romanticized.
Photograph:
- corrosion,
- scratches,
- material loss,
- residue,
- repairs,
- and alterations.
Extraordinary Claims
Where an object is described as flown, mission-used, stage-used or historically deployed, the images should support the chain of evidence where possible.
Photography alone does not prove the claim, but it should document the identifiers on which the claim depends.
15. Packaging Photography

Packaging can materially affect value and authenticity.
Required Packaging Views
Include:
- front,
- reverse,
- sides,
- top,
- bottom,
- labels,
- seals,
- corners,
- inserts,
- and internal packaging where opened.
Seal Condition
Photograph:
- factory seals,
- broken seals,
- replacement tape,
- shrink wrap,
- and any signs of opening.
Box Damage
Show:
- crushing,
- dents,
- tears,
- discoloration,
- sticker residue,
- split seams,
- and water damage.
Packaging as Evidence
Packaging should be photographed not only for aesthetics but for:
- barcodes,
- copyright information,
- product names,
- release identifiers,
- regional markings,
- and authentication features.
Sealed Objects
When an object remains sealed, do not use official product images in a way that implies the internal object has been inspected.
The visual record should distinguish between:
- what is visible,
- and what is assumed based on official packaging.
16. Condition Photography

Condition photography is one of the most important trust signals in online collecting.
Material Issues Must Be Visible
If a condition issue is important enough to mention, it should generally be photographed.
Neutral Lighting
Use normal neutral lighting first.
This shows how the flaw appears during ordinary viewing.
Revealing Lighting
Use raking or angled light when necessary to show:
- creases,
- surface impressions,
- scratches,
- or gloss variation.
Context and Detail
Provide:
- a wider image showing where the issue is located,
- a close-up showing the issue itself.
A close-up without context can make a flaw appear either more severe or less significant than it is.
No Dramatic Exaggeration
Condition photography should reveal, not sensationalize.
Extreme magnification may be useful but should be identified.
Condition Captions
Captions should state:
- issue,
- location,
- visibility,
- and relationship to the image or object.
Example:
Small handling crease near the lower-right sheet edge. Most visible under angled light and outside the primary image area.
17. Certificate and Document Photography

Documentation should be legible and connected to the correct object.
Certificate Images
Show:
- complete front,
- complete reverse,
- issuer,
- certification number,
- hologram,
- signatures,
- date,
- and object description.
Verification Screens
Where appropriate, preserve a screenshot or PDF of the public verification result.
Redaction
Private information may be redacted in public images.
The internal unredacted record should be preserved.
Image Pairing
The certificate should be photographed alongside the object when practical.
This helps show that the document and object were physically present together.
Document Condition
Disclose:
- folds,
- tears,
- fading,
- stains,
- missing pages,
- or replacement documents.
Seller-Created Documentation
Gauntlet-issued documentation should be visually distinguished from independent third-party authentication.
The design should not create confusion regarding who issued the underlying opinion.
18. Scale Photography

Scale is routinely misunderstood online.
Exact dimensions should always be listed, but images help collectors visualize them.
In-Room Views
Show artwork or objects in a realistic setting.
The setting should communicate:
- wall coverage,
- furniture relationship,
- and viewing distance.
Human Reference
A person holding or standing near an object can communicate scale effectively.
The person should not cover important areas.
Measurement Reference
A ruler or tape measure may be shown in documentary images.
Digital Mockups
Digital room mockups are useful but must be labeled as simulations.
The scale should be calculated from actual dimensions.
A digital mockup should not:
- enlarge the object for drama,
- hide framing differences,
- or imply a real installation.
19. Video Standards

Video can communicate physical qualities that still images cannot.
Primary Video Objectives
A good object video should show:
- overall form,
- surface response to light,
- scale,
- material,
- condition,
- signature,
- authentication,
- and display presence.
Video Length
Different uses require different lengths.
Short Product Clip
Approximately 15–30 seconds.
Purpose:
- immediate visual impact,
- surface movement,
- and scale.
Standard Object Walkthrough
Approximately 45–90 seconds.
Purpose:
- overall inspection,
- details,
- certificate,
- and curator explanation.
Extended Research or Collector Video
Several minutes or longer.
Purpose:
- historical context,
- authentication,
- market background,
- and close examination.
Camera Movement
Movement should be slow and controlled.
Fast movement can conceal detail and reduce trust.
Focus
The camera should hold focus on:
- signature,
- certificate number,
- markings,
- and condition.
Audio
Audio may include:
- curator narration,
- object history,
- or neutral room sound.
Music should not overpower the information.
Editing
Cuts should support clarity.
Do not edit around flaws.
Captions
Videos should include captions for accessibility and silent viewing.
20. Curatorial Storytelling Through Presentation

Presentation should help explain why the object matters.
This does not require theatrical staging.
It requires visual sequencing.
A useful sequence may move through:
- complete object,
- creator or signature,
- production details,
- condition,
- authentication,
- historical context,
- scale,
- display possibility.
This sequence mirrors the collector’s questions.
Historical Material
Where rights and accuracy permit, product presentations may include:
- archival photographs,
- exhibition flyers,
- release announcements,
- mission images,
- performance context,
- or related works.
These materials should be clearly distinguished from the object being sold.
Comparative Images
Comparative images may show:
- related colorways,
- earlier and later releases,
- official reference examples,
- or size differences.
They should not imply that all pictured objects are included.
Narrative Restraint
The story should remain anchored to the object.
A long historical narrative cannot compensate for weak identification or inadequate condition disclosure.
21. Website Presentation Standards

Strong photography can be weakened by poor site presentation.
Image Order
The image gallery should follow a predictable sequence:
- hero,
- complete views,
- detail,
- condition,
- documentation,
- scale,
- lifestyle.
Zoom
High-resolution zoom should be available for important details.
Mobile Presentation
Images must be tested on mobile.
Collectors should be able to inspect:
- signatures,
- condition,
- and certificates
without excessive pinching or loss of resolution.
Captions
Captions should identify:
- condition,
- alternate view,
- certificate,
- stock image,
- or digital simulation.
Alt Text
Alt text should describe the image accurately for:
- accessibility,
- search,
- and machine interpretation.
Example:
Shepard Fairey signed screen print, full front view, framed in black.
Avoid keyword stuffing.
Image Compression
Images should load efficiently without destroying detail.
The site may use compressed derivatives while retaining high-resolution originals.
Consistent Ratios
Consistent image ratios improve browsing, but images should not be cropped in ways that remove important object information.
22. Social Media and Editorial Presentation

Social images may be more expressive than catalog images.
They must still remain truthful.
Social Cropping
Cropped details may be used to create visual impact.
The full object should remain available through the listing or accompanying sequence.
Text Overlays
Text overlays should not cover:
- signatures,
- edition numbers,
- condition,
- or key visual elements.
Reels and Short-Form Video
Short-form content may highlight:
- one historical fact,
- one authentication detail,
- one market insight,
- or one visual feature.
It should not compress a complex claim into a misleading slogan.
Promotional Language
Avoid visual claims such as:
- guaranteed appreciation,
- museum-level,
- ultra-rare,
- or investment-grade
without a defensible basis.
23. Live Exhibition and Pop-Up Presentation

Gauntlet’s physical events should extend the same presentation standards into temporary spaces.
Exhibition Design
Each event should have:
- a clear curatorial thesis,
- controlled visual identity,
- consistent labels,
- adequate lighting,
- safe display systems,
- and accessible object information.
Object Labels
Labels should include:
- creator,
- title,
- date,
- medium,
- dimensions,
- edition,
- authentication where relevant,
- and concise context.
QR Integration
QR codes may provide access to:
- extended history,
- authentication records,
- video,
- pricing methodology,
- and collector guides.
Lighting
Temporary spaces often have poor ambient light.
Portable lighting should be used to ensure:
- accurate color,
- safe brightness,
- minimal glare,
- and consistent presentation.
Security
Display systems should account for:
- handling,
- crowd flow,
- theft,
- accidental impact,
- and environmental exposure.
Photography at Events
Every live event should be documented through:
- installation images,
- object views,
- visitor interaction,
- signage,
- and video.
These records become part of the Gauntlet exhibition archive.
Temporary Does Not Mean Casual
A pop-up should not feel improvised.
Its temporary nature should create focus, not lower standards.
24. Packaging and Unboxing Presentation

The collector experience continues after purchase.
Packaging communicates whether the gallery treats the object as cultural material or ordinary inventory.
Pre-Shipment Photography
Before packing, document:
- complete object,
- condition,
- authentication,
- included materials,
- and packaging state.
Packing Process
For higher-value items, preserve images showing:
- protective layers,
- corner protection,
- box construction,
- and final seal.
Certificate Placement
Certificates should be protected from:
- bending,
- moisture,
- abrasion,
- and separation from the object.
Presentation on Arrival
The opening sequence should feel organized.
Included materials may be arranged in the following order:
- welcome or thank-you note,
- object summary,
- authentication and certificate,
- care guidance,
- provenance or catalog information,
- object.
The exact sequence will vary by object type.
Branded Materials
Branding should support the experience without overwhelming the object.
The collectible remains primary.
25. Archival File Management

Photography has long-term value only if the files remain organized.
Folder Structure
Each object should have a dedicated folder tied to its catalog identifier.
Example:
GG-ART-2026-00481 — Originals — Processed — Condition — Documentation — Video — Web — Sold Archive
File Naming
File names should identify:
- object,
- view,
- and version.
Original Preservation
Original files should never be overwritten.
Metadata
Where practical, retain:
- capture date,
- camera,
- lens,
- creator,
- rights,
- and object identifier.
Backups
Maintain redundant backups.
A strong approach includes:
- active working storage,
- local backup,
- and secure off-site or cloud backup.
Access Control
Sensitive files containing:
- private invoices,
- buyer information,
- or unredacted provenance
should be separated from public media.
26. Quality-Control Review

Before publication, the visual record should pass a formal review.
Accuracy Review
Confirm:
- object matches inventory record,
- colors are reasonable,
- proportions are correct,
- and no important area is omitted.
Completeness Review
Confirm the presence of:
- front,
- reverse where accessible,
- signature,
- edition,
- authentication,
- condition,
- and packaging.
Condition Review
Confirm that every material disclosed flaw is visible in the image set.
Documentation Review
Confirm:
- certificate number is legible,
- document matches the object,
- and private information is properly handled.
Website Review
Test:
- desktop,
- mobile,
- zoom,
- image sequence,
- and captions.
Final Object Match
Before shipment, compare the physical object with:
- listing,
- photographs,
- certificate,
- and order.
This reduces the risk of sending the wrong example or documentation.
27. What Gauntlet Will Not Do

Gauntlet will not knowingly:
- remove condition issues digitally,
- reuse photographs of a materially different signed or numbered object,
- alter an autograph to improve legibility,
- increase saturation to create false visual intensity,
- use a room mockup without identifying it as a simulation,
- crop away damaged corners,
- hide missing packaging,
- show documentation from another example,
- imply independent authentication through Gauntlet-branded paperwork,
- present a signature close-up without the complete object,
- or use video editing to conceal material flaws.
The visual record must remain accountable to the object.
28. The Gauntlet Presentation Principles

1. The Actual Object Comes First
Item-specific images are the default for unique and condition-sensitive pieces.
2. Accuracy Is More Important Than Drama
Strong presentation should not distort reality.
3. Every Material Claim Should Be Visible
Signatures, edition numbers, markings and certificates should be shown.
4. Condition Must Be Photographed
Important flaws belong in the visual record.
5. Scale Must Be Understandable
Dimensions and visual references should work together.
6. Documentation Should Be Legible
Certificates and identifiers must be readable.
7. The Reverse Matters
The back of an object may contain critical evidence.
8. Original Files Must Be Preserved
The archival record should outlast the listing.
9. Stock Images Must Be Labeled
Official or representative images must not be confused with the actual item.
10. Digital Mockups Must Be Honest
Simulated environments should use accurate scale and clear labels.
11. Video Should Reveal Surface and Condition
Movement should improve understanding, not distract from it.
12. Presentation Should Be Consistent
Every object should feel part of the same institution.
13. Temporary Exhibitions Require Permanent Standards
Pop-up does not mean improvised.
14. Packaging Is Part of Presentation
The collector experience extends through delivery.
15. The Object Must Look Familiar on Arrival
The collector should recognize exactly what they purchased.
Conclusion

Photography is often treated as decoration around the sale.
At Gauntlet Gallery, it is part of the catalog record, the condition report, the authentication file and the collector experience.
A strong visual presentation should allow a person who has never handled the object to understand:
- its overall form,
- size,
- color,
- surface,
- signature,
- edition,
- condition,
- documentation,
- and display potential.
It should also reveal the limits of the presentation.
A photograph cannot prove every authentication claim.
A video cannot replace physical inspection.
A digital room mockup cannot recreate exact lighting or scale perception.
But careful visual documentation can dramatically reduce uncertainty.
It can preserve evidence before shipment.
It can support insurance and resale.
It can protect both buyer and seller.
It can make historical records usable.
And it can demonstrate that attention to detail is not a marketing phrase but a visible operating practice.
The standard is therefore simple:
Present every object at its strongest, but never as something it is not.
That means:
- clear light,
- honest color,
- complete views,
- visible flaws,
- legible documentation,
- accurate scale,
- controlled editing,
- and permanent file preservation.
A collector should not need to imagine what has been omitted.
They should be able to examine the visual record, understand the object and make a decision with confidence.
That is the Gauntlet Photography and Presentation Standard.
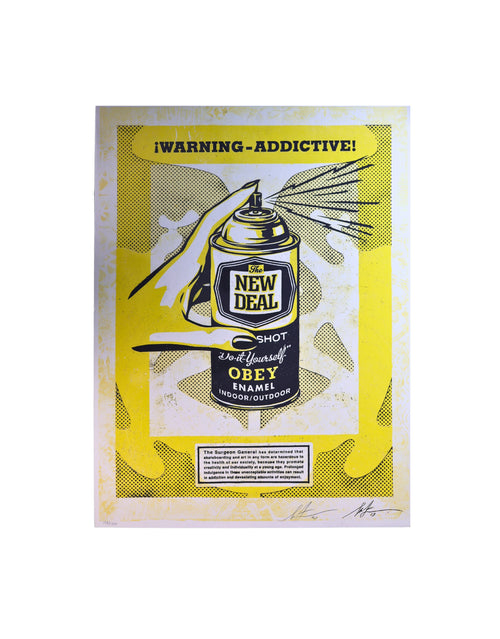
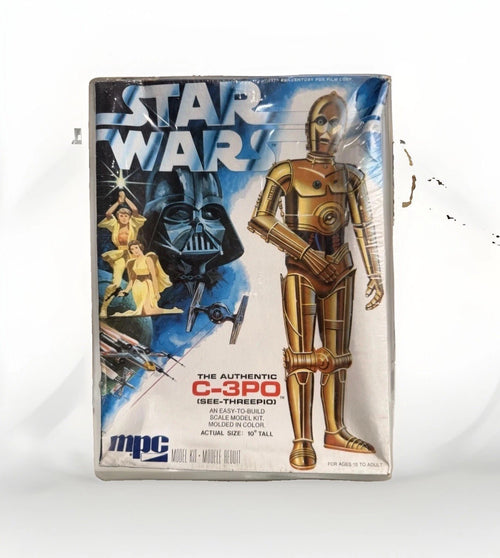
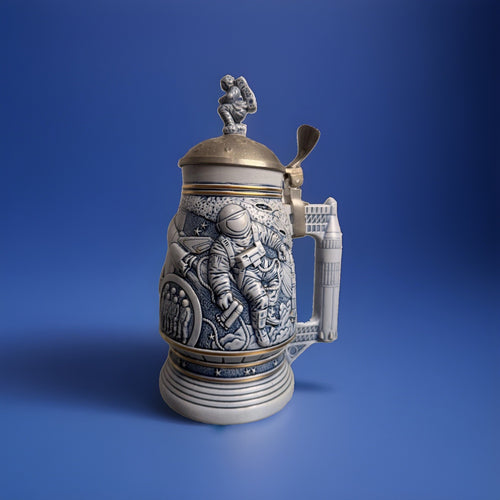
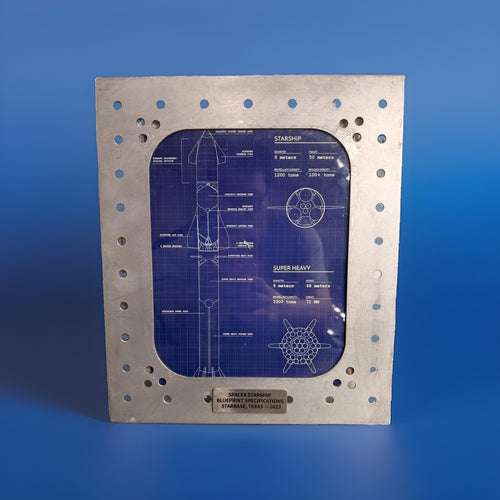
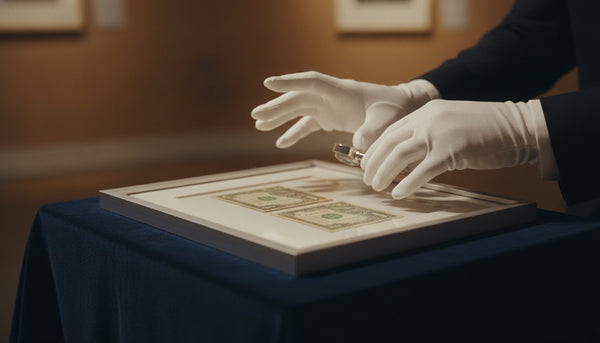
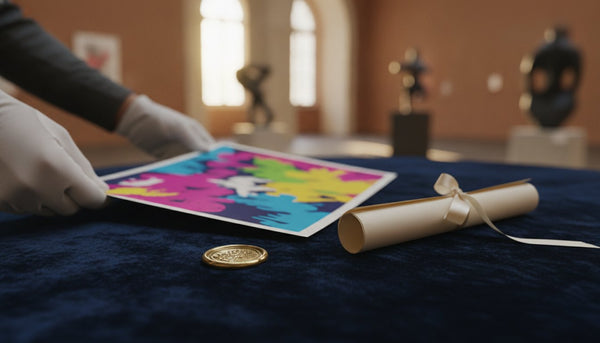
Editorial image disclosure: Illustrations on this page were generated with Nano Banana for explanatory use. They are not authentication evidence, provenance records, or reproductions of any specific collectible.