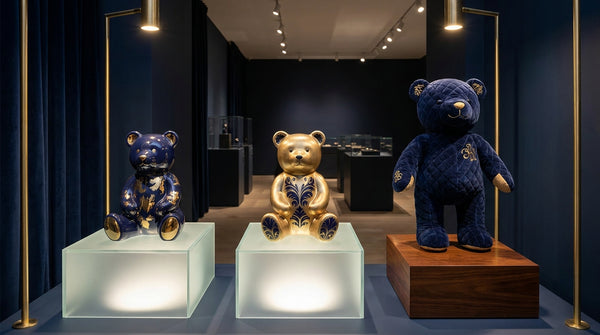
How BE@RBRICK Sizes (100%, 400%, 1000%) Drive Value
How do BE@RBRICK sizes affect value? In short: size is one of the biggest levers on a BE@RBRICK's price. Medicom Toy builds every bear to the same silhouette but at different scales — expressed as a percentage of the original 100% figure — and larger scales are produced in far smaller quantities, so they command a premium. A 100% bear is a pocket-sized keychain-scale piece, a 400% is the popular ~11-inch shelf figure, and a 1000% is a roughly 27-inch statement piece. But size never works alone: the same scale can vary widely in value depending on the artist collaboration, the design's demand, the material, and condition. This guide explains the percentage system, approximate heights, and exactly how scale interacts with rarity, display, shipping, and authentication so you can buy with confidence.
The BE@RBRICK percentage size system explained
BE@RBRICK (pronounced "bear-brick") is a collectible figure produced by the Japanese company Medicom Toy since 2001. Every figure shares the same iconic blocky bear form — the difference between them is the artwork printed or sculpted on that form, and the scale at which it's produced. Medicom expresses scale as a percentage, where 100% is the baseline size. Larger percentages are proportionally bigger versions of the exact same silhouette.
The percentage is not a random label — it is a genuine scaling ratio. A 400% figure is four times the height of a 100% figure; a 1000% figure is ten times the height. This clean, predictable system is part of why collectors find BE@RBRICKs so easy to understand and display as a set. The most common sizes you will encounter on the secondary market are the 100%, the 400%, and the 1000%, along with the frequently released 100% + 400% two-pack set.
The standard sizes and their approximate heights
Heights below are approximate and describe the general scale of each figure rather than an exact measurement — always confirm the listed dimensions on any specific piece, since packaging and articulation points can vary slightly:
- 50% — a miniature figure, roughly palm-height (about 3 inches). Often released as blind-box or keychain-style pieces.
- 100% — the baseline figure, roughly 3 inches tall (similar in scale to the 50% in the hand but the true reference size for the line). This is the size that anchors the percentage system and the size most often paired in sets.
- 400% — the most collected "display" size, roughly 11 inches (around 28 cm). Large enough to be a shelf centerpiece, small enough to be practical to store and ship. This is the default size most people picture when they think "BE@RBRICK."
- 1000% — the flagship statement size, roughly 27 inches (around 70 cm). A floor- or plinth-scale piece that dominates a room.
You may also occasionally see 70%, 150%, 200%, and other intermediate scales for specific releases, but the 100%, 400%, and 1000% are the pillars of the market. The graduated line-up — small to large — is exactly what makes a shelf of BE@RBRICKs so visually satisfying, and it's why many collectors chase the same design across multiple sizes.
A useful mental model: think of the percentage as a "zoom level" on one fixed sculpture. Medicom does not redesign the bear at each scale — the proportions, the joint points (BE@RBRICKs are articulated at the head, arms, waist, and legs), and the overall geometry stay identical. What changes is how much physical material the figure requires and, crucially, how many of them the factory produces. That combination — identical design, wildly different production volume — is the engine behind the entire pricing structure you'll see below.
Why the 100% + 400% set is so common
Medicom very frequently releases a given design as a 100% + 400% two-pack. This pairing has become the standard "entry" format for a new collaboration: you get the collectible pocket-sized 100% and the display-friendly 400% together in one box. Because the set is designed to be sold and kept as a pair, collectors generally prize complete, unsplit 100%+400% sets — a matched pair with both figures and original packaging typically holds value better than a lone half. When you evaluate a listing, check whether a "set" actually includes both figures or just one.
How size affects price and rarity
The single clearest rule in BE@RBRICK collecting is that, for the same design, a larger scale almost always carries a higher price. This is driven primarily by production quantity. Medicom produces the large 1000% figures in dramatically smaller runs than the 400% or 100%, simply because they cost far more to manufacture, package, and ship. Lower supply against steady collector demand pushes secondary-market values up.
The rarity ladder
- 100% — highest production volume, most affordable, easiest to find. Great for completing a design set or building a broad collection.
- 400% — moderate production, the "sweet spot" most collectors target. Strong, liquid demand and a wide range of designs available.
- 1000% — lowest production, highest scarcity, and the biggest visual impact. This is where premiums are steepest.
Because pricing depends heavily on the specific collaboration and its demand, we deliberately avoid quoting exact figures here — a sought-after artist 1000% and a common licensed 1000% can sit at very different price points. For current market context and how condition and edition affect realized values, see our Financial Insights resource. The reliable takeaway: hold the design constant, and value climbs with size.
Why supply, not just "bigger," sets the premium
It's tempting to assume a 1000% costs more simply because it's larger and uses more plastic — and material cost is real — but the dominant driver is scarcity. Medicom calibrates production to expected demand and manufacturing economics, and the practical result is a steep supply curve: many 100% and 400% units, comparatively few 1000% units. When a limited number of large figures meets an enthusiastic collector base, competition does the rest. This is why two figures with the same retail-era design can diverge sharply on the secondary market as the small 1000% supply gets absorbed into collections and stops circulating.
The same scarcity logic explains why limited or region-exclusive releases can outperform their size class. A 400% produced for a specific event, store, or short window can trade above a standard 400% — and sometimes rival larger figures — purely because fewer exist. When you assess a piece, try to understand not just its size but roughly how constrained its release was.
Why 1000% commands a premium
The 1000% figure is the crown of most BE@RBRICK collections, and several factors compound to justify its premium:
- Scarcity: far fewer 1000% units are produced per release than 400% or 100%, so supply is genuinely limited.
- Manufacturing cost and complexity: a roughly 27-inch figure uses far more material and is more demanding to mold, finish, and quality-check. That cost is reflected at retail and carries through to resale.
- Presence and display value: a 1000% is a design object in its own right — a floor- or pedestal-scale sculpture that anchors a room. Many buyers pay a premium specifically for that impact.
- Shipping and handling friction: large, heavy, fragile figures are harder and costlier to store and transport, which thins the pool of pristine examples over time and rewards well-kept pieces.
- Collector aspiration: the 1000% is often the "grail" tier of a given collaboration, so it attracts the most competitive demand.
Put simply, the 1000% concentrates every value driver — rarity, cost, presence, and desirability — into a single figure. That's why, for a design collectors love, the 1000% typically sits at the top of the value ladder.
Size and display: choosing the right scale for your space
Value aside, size is a practical decision about how you want to live with the piece. The scale you choose changes the room it belongs in and the way it reads.
- 100%: desk, shelf edge, or grouped in a cluster. Ideal for building a "wall" of many designs in a small footprint.
- 400%: the everyday hero. Fits a standard shelf or cabinet, reads clearly from across a room, and is the most versatile for rotating displays.
- 1000%: a floor or plinth piece. It needs dedicated space and sightlines — treat it like a sculpture, not a shelf toy.
Many collectors intentionally buy the same design in graduated sizes to create a stepped, small-to-large line-up. It's a striking way to display a favorite collaboration and a large part of the aesthetic appeal of the format.
How size interacts with design, collaboration, and material
Size sets the ceiling, but the design determines where within that ceiling a figure actually trades. Two 400% bears can be worlds apart in value.
The collaboration matters more than the number
Medicom has partnered with a vast range of artists, fashion houses, entertainment properties, and brands. A BE@RBRICK tied to a highly sought-after artist or a hyped fashion collaboration can outvalue a larger figure from a common licensed release. In other words, a beloved-design 400% can be worth more than a generic 1000%. When you evaluate a piece, weigh the collaboration's demand alongside its size — never size in isolation.
Material and finish
Finish is another multiplier. Standard figures use painted or printed plastic, but Medicom also produces special editions with distinctive materials and finishes — metallic and chrome treatments, translucent "jellybean" plastics, flocked (velvety) surfaces, wood-grain, and other premium constructions. These special materials are usually made in smaller numbers and can carry meaningful premiums at any size. A special-material 400% can rival or exceed a standard 1000% of the same design.
Condition and completeness
Regardless of size, condition and completeness drive realized value:
- Original packaging (box and any inserts) matters, especially for larger and limited figures.
- Surface condition — no scuffs, paint rubs, cracks, or sun-fading. Glossy finishes show wear more readily.
- Complete sets — for 100%+400% two-packs, both figures present and matched.
- Unmodified — no customization or repainting if you're buying for value.
Size comparison table
| Size | Approx. height | Typical role | Relative production | Relative value (same design) |
|---|---|---|---|---|
| 50% | ~3 in (miniature) | Keychain / blind-box mini | High | Entry |
| 100% | ~3 in (baseline) | Pocket figure; set anchor | Highest | Lowest |
| 100% + 400% set | ~3 in & ~11 in | Standard collaboration two-pack | Common release format | Value best when complete & unsplit |
| 400% | ~11 in (~28 cm) | Display centerpiece; the "sweet spot" | Moderate | Mid — most liquid market |
| 1000% | ~27 in (~70 cm) | Floor/plinth statement piece | Lowest | Highest — premium tier |
Heights are approximate general references. Confirm exact dimensions on any specific figure before purchase.
Shipping and storing larger BE@RBRICKs
Scale changes the logistics. A 100% ships in a padded envelope; a 1000% is a bulky, heavy, breakable object that needs careful double-boxing, corner protection, and often freight-style handling. This affects both cost and risk:
- Cost: shipping a 1000% can be a significant line item — factor it into your total acquisition budget.
- Risk: more surface area and weight means more chance of transit damage. Buy from sellers who describe their packing method and insure large pieces.
- Storage: keep figures out of direct sunlight (to prevent fading and yellowing) and away from heat. Retain the original box for larger pieces — it protects the figure and supports resale value.
Authenticating a BE@RBRICK before you buy
BE@RBRICKs, especially popular collaborations and larger scales, are targets for counterfeits. Protect yourself with verified, general principles rather than relying on any single "tell":
- Buy from reputable dealers and platforms with clear return policies and provenance — this is the most reliable safeguard at any size.
- Third-party authentication: where applicable, KAWS and BE@RBRICK pieces we handle are supported by TrueCOA certificates, and select figures carry embedded NFC verification you can tap to confirm. Ask whether a piece includes third-party COA and/or NFC.
- Original packaging and inserts: genuine Medicom packaging, printing quality, and hardware are consistent; sloppy boxes or misaligned printing are warning signs.
- Edition transparency: a trustworthy seller can speak clearly to the release, the collaboration, and the size without evasion.
For a deeper walkthrough of what to look for on a specific piece, see our BE@RBRICK buyer's guide, and browse authenticated inventory in the BE@RBRICK collection.
Choosing a size as a new collector
If you're building your first BE@RBRICK collection, let size follow your goal rather than the other way around:
- Want breadth and variety on a budget? Start with 100% figures and 100%+400% sets. You'll be able to own more designs, learn which collaborations you love, and see how the market behaves before committing more capital.
- Want a display collection you'll keep long-term? The 400% is the classic core. It reads well on a shelf, has the deepest and most liquid resale market, and covers the widest range of designs — making it the easiest size to buy and sell responsibly.
- Want a centerpiece or a grail? A single 1000% of a design you truly love can anchor an entire room. Because it carries the biggest premium and the most shipping and storage friction, buy it deliberately, from a source you trust, with authentication in hand.
A popular long-game strategy is to pick one design you're passionate about and acquire it in graduated sizes over time — a 100%, then the 400%, and eventually the 1000% — producing that stepped, small-to-large line-up that looks so striking on display. Whatever path you choose, prioritize condition, completeness, and authenticity over rushing to the largest size. A pristine, verified 400% is a better hold than a damaged or questionable 1000%. When you're ready to browse specific pieces, our BE@RBRICK collection lists authenticated figures across sizes.
Frequently asked questions
What is the difference between 100%, 400%, and 1000% BE@RBRICKs?
They are the same bear figure produced at different scales. 100% is the baseline pocket size (roughly 3 inches), 400% is about four times taller (roughly 11 inches, the popular display size), and 1000% is about ten times taller (roughly 27 inches, the flagship statement size). The percentage is a true scaling ratio, so a 1000% is proportionally ten times the height of a 100%.
Which BE@RBRICK size is most valuable?
For the same design, the 1000% is almost always the most valuable because it is produced in the smallest quantities, costs the most to manufacture, and has the greatest display presence. That said, size is only one factor — a highly sought-after artist collaboration in a smaller size can outvalue a common design in a larger size.
How tall is a 400% BE@RBRICK?
A 400% BE@RBRICK is roughly 11 inches (about 28 cm) tall. It's the most collected size because it's large enough to be a genuine display centerpiece yet still practical to store and ship. Always confirm the exact listed dimensions for the specific figure you're considering.
Why does a 1000% BE@RBRICK cost so much more than a 400%?
Several factors stack: 1000% figures are produced in far smaller runs, they use much more material and are more complex and costly to manufacture, they carry significant shipping and storage friction, and they have outsized display presence. Together, scarcity, cost, and desirability push the 1000% to the top of the value ladder for a given design.
Does size matter more than the artist collaboration for value?
No — they work together. Size sets the general ceiling, but the collaboration determines where within that ceiling a figure trades. A beloved artist or hyped fashion collaboration can make a 400% worth more than a common 1000%. Always weigh the specific design's demand and the material/finish alongside the size.
How should I authenticate a BE@RBRICK before buying?
Buy from reputable dealers with provenance and clear return policies, and ask whether the piece includes third-party authentication. KAWS and BE@RBRICK pieces we handle are supported by TrueCOA certificates, and select figures include embedded NFC verification you can tap to confirm. Verify original packaging quality and insist on edition transparency rather than relying on a single visual "tell."
Buy & authenticate with confidence
Once you understand the size system, BE@RBRICK collecting becomes far easier to navigate: choose the scale that fits your space and budget, weigh the collaboration and material alongside the size, and always confirm authenticity before you buy. Explore our authenticated BE@RBRICK collection and read the full BE@RBRICK buyer's guide for design-by-design detail. To ground any purchase in the wider market, our Financial Insights hub tracks how condition and edition shape value, and the Collector's Hub centralizes our authentication standards, including TrueCOA and NFC verification. New to art toys and collectibles more broadly? Start with our buyer's guides library or browse everything in the full catalog. Buy on knowledge, buy authenticated, and buy the size that's right for you.