Direct answer
Identify a BE@RBRICK release by building a record from the exact figure and, if present, its packaging: record the scale, artwork or colorway description, collaboration context, edition or series information, product-code-like details, measurements, condition, and every label verbatim. Then compare that record with multiple release-specific sources—not just one marketplace listing or a box image. A box, a mark, a number, or a certificate on its own is not universal proof of what an item is. The goal is a defensible match between the object in hand and a documented release, while preserving uncertainty where the evidence does not line up.
Table of contents
- What it means to identify a release
- Scope and overlap check
- Start with the exact object, not the listing title
- Build an evidence packet
- Match the record in the right order
- Figure, packaging, and documentation: what each can and cannot establish
- Common identification traps
- A practical release-identification checklist
- When the evidence remains incomplete
- Related guides
- FAQs
- Source notes and limitations
- Nano Banana image briefs
What it means to identify a release
Collectors often ask for an answer that sounds binary: “What BE@RBRICK is this?” In practice, a useful answer has several layers. You may be able to identify the general form factor quickly—a bear-shaped vinyl collectible, a size class, a visible design family—while still not knowing the exact release, the intended package configuration, whether a box belongs with that figure, or whether the item has been altered since it left its first owner.
This guide is about release identification, not a universal authentication service. Identification assigns the most supportable release description to the specific object under review. Authentication asks whether the object conforms to that release; condition asks what has happened to it; price asks what a buyer and seller may agree at a given time. Keeping those questions separate prevents a plausible name from becoming proof of every other claim.
The best unit of work is not “find something that looks similar.” It is “make a chain of matching facts.” An exact figure might match a catalog image in silhouette yet differ in scale. A loose figure might match the artwork but have packaging from another version. A box can be real packaging and still be a poor match for the object inside. The task is to map the whole set of facts, one layer at a time.
Scope and overlap check
This article deliberately does not duplicate two existing Gauntlet Gallery pages checked for overlap:
- How to Authenticate a BE@RBRICK: Complete Verification Guide addresses verification and inspection questions.
- BE@RBRICK: Complete Guide to Sizes, Authentication, Value & Where to Buy is a broad collector primer.
The distinct intent here is narrower: create a repeatable research record that connects the exact figure, its box label or insert, and a release-specific catalog trail. It is intentionally useful before a purchase, after an estate find, or while preparing a condition report. If your question is whether visible details support a particular item being genuine, use the authentication guide after you have built the identification record. If you need scale context or a general entry point, use the complete guide.
The workflow also prepares readers for the sibling draft BE@RBRICK Condition Grading Before Buying: knowing the release is what makes it possible to describe whether its box, joints, paint, accessories, or presentation have changed. If your research hinges on dates, edition language, or an incomplete product history, How to Identify an Older DEATH NYC Print shows a parallel evidence-log method for another collectible format.
Start with the exact object, not the listing title
Marketplace titles are leads, not evidence. Sellers may shorten names, describe a collaboration loosely, reuse prior text, or attach a broad keyword to reach more searches. A title that says “rare,” “limited,” “original,” “sealed,” or “factory” tells you how the seller wants the listing to be found; it does not complete the identification work.
Begin with an object file. Give the item a neutral working name such as “Figure A, received 2026-08-06.” Do not start by naming it after a suspected release. That small discipline reduces confirmation bias: once a researcher has decided that an object must be a certain collaboration or year, contradictory clues become easy to ignore.
Photograph the object before cleaning it, opening additional packaging, or separating pieces that arrived together. Capture the front, back, both sides, top, feet, joints, any underside markings, and any surface feature that may distinguish the design. Photograph packaging on all sides, labels straight-on, seals and tape as found, inserts, receipts, and any note that came with the item. Use diffuse light for overall images and raking light for surface condition. A scale ruler in one non-glamour reference photo can help later; avoid placing it directly on delicate surfaces.
Then transcribe, rather than paraphrase, every visible label. Preserve capitalization, punctuation, language, product strings, date-style information, barcodes, and distributor details exactly as printed. If a character cannot be read, write [illegible] rather than guessing.
Finally, separate what belongs to the figure from what belongs to the package. A loose figure can be researched on its own. A box can be researched on its own. Their relationship is a separate hypothesis that must be supported by compatible scale, design, configuration, and presentation evidence.
Build an evidence packet
An evidence packet turns a casual search into a repeatable process. It should fit in a simple folder or spreadsheet and should not pretend to say more than it can prove. The core packet has five parts.
1. Object description
Record the physical facts without interpretation:
- Height, measured carefully and with the method noted.
- Dominant colors, finish, visible pattern or artwork description, and material appearance.
- Articulation points and any visible construction features.
- Current condition: scratches, scuffs, yellowing, loose joints, odor, dust, fading, repairs, or residues.
- Any accessories, stands, cards, bags, or inserts present at intake.
Avoid an implied conclusion such as “factory paint” in this section. Better wording is “glossy opaque red coating with several chips on right arm” because another reader can inspect it without accepting a conclusion you have not established.
2. Marking transcription
Build a dedicated field for every mark observed. Include its exact location: “underside of left foot,” “inside lower box panel,” “clear bag insert,” or “rear insert card.” Photograph each marking at high resolution and keep the unedited original image. A crop can aid research, but a crop without the wider context can make a label look like it belongs to a different part.
If a product or bar-code-like string appears, record it character for character. Do not use a database search result to fill gaps in a blurred label. A typo in a copied sequence can lead to an apparently perfect—but wrong—catalog match.
3. Release clues
Release clues describe the candidate match: scale, design name, series or collaboration description, issue format, approximate release period, known package configuration, and known inclusions. Treat each as a separate field. A collector might know that the art design appears in more than one scale or package; keeping the fields discrete makes mismatches visible early.
4. Provenance and seller context
Provenance does not require a dramatic backstory. It can be as simple as a dated receipt, an old collection inventory, a clear chain of resales, a retailer invoice, or a conversation documented in writing. Record what the source actually says and who supplied it. A prior owner’s assertion can be useful context, but it is not a substitute for object-level comparison.
5. Research log
For each source, note the URL or citation, the date you accessed it, the information you relied on, and any conflict. When sources disagree, do not quietly choose the one you prefer. Write down the conflict: for example, “design matches Source A, but stated scale differs,” or “package style resembles Source B but label remains unreadable.” That makes the eventual conclusion more trustworthy.
Match the record in the right order
The most efficient research sequence moves from high-level constraints to release-specific evidence. It reduces the temptation to search a vague visual phrase until something looks right.
Step 1: Establish scale and configuration
Determine the approximate figure height and whether the item is a single figure, a paired set, a display piece, or part of a blind-box-style format. Measurements narrow the candidate pool, but they are not a final answer. Measure more than once if the figure stands unevenly, and note whether the measurement excludes an accessory or base.
The catalog record needs to describe the same configuration. A 100% figure and a 400% companion may share a design but belong to different packages. A two-piece package, a multi-size set, or a special presentation format should not be collapsed into one generic release name.
Step 2: Describe the design without importing a title
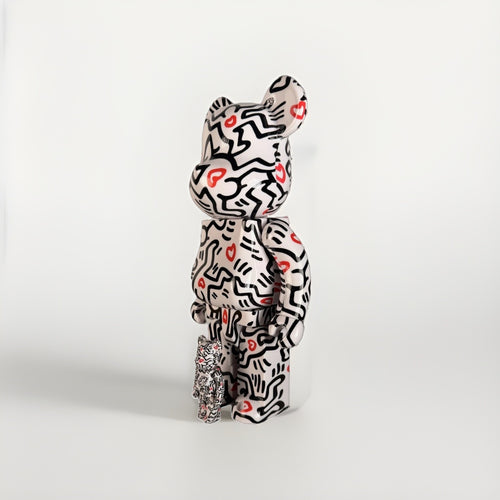
Write what you can see in ordinary language: “black ground with repeating white geometric marks,” “translucent body with suspended-looking colored material,” “all-over photographic-style print,” or “solid metallic-looking finish.” Record orientation—front, back, left and right—because some designs have details that are not symmetrical.
This descriptive record separates observable elements from assumptions about a collaboration. If the visual language resembles a familiar artist or brand, note it as a research lead rather than the identification.
Step 3: Compare compatible primary or first-party release records where available
Look for release-specific records that can speak to format, scale, design, date, and packaging. These may include manufacturer announcements, retailer release pages, exhibition or collaboration materials, contemporaneous catalogs, or retailer invoices. Availability changes and older pages can disappear, so save a dated copy or screenshot of the information you relied on when permitted.
One release image is not enough. Seek at least two independently useful points of comparison: a product description plus a period catalog, a label match plus a packaging shot, or a release announcement plus a documented retailer listing. “Independently useful” does not necessarily mean unrelated websites; it means the evidence addresses more than the same recycled photo and title.
Step 4: Compare the figure and box as separate evidence streams
Place the object photos beside the candidate record. Compare scale, print placement, color, materials, joints, and placement of visible marks. Then separately compare box dimensions, label format, art layout, language, listed contents, and any product string. If the figure and box both align with the same release record, your match strengthens. If only one does, the relationship remains unconfirmed.
Do not force a match when a box was clearly reused for storage. A compatible-looking carton with a loose figure can be useful for protection, but it should not be described as original pairing unless the evidence supports that conclusion.
Step 5: Use secondary-market records as comparison material, not as the archive
Auction pages, dealer pages, collector forums, and completed listings can reveal alternate names, packaging photographs, and historical examples. Their descriptions may be incomplete or copied. Use them to generate questions, then verify through a more reliable release-specific source where possible.
Step 6: State a proportional conclusion
Choose language that matches the packet:
- Documented match: figure and package details align with multiple release-specific sources, with no unresolved material mismatch.
- Probable match: core features align, but one or more material details cannot be checked.
- Unresolved: the candidate is plausible but the distinguishing evidence is missing, conflicting, or too poor to read.
- Mismatch identified: a measurable or documented feature conflicts with the candidate release.
These are research statuses, not commercial grades. They make room for evidence to improve later.
Figure, packaging, and documentation: what each can and cannot establish
Different materials answer different questions. Over-weighting one is a frequent source of bad identifications.
The figure can provide direct visual and physical information: scale, form, finish, print placement, construction, wear, and visible marks. It cannot, by itself, prove that it came from a particular sealed package or that every original component is present.
The box or outer packaging may preserve a title, configuration, label information, and clues about intended distribution. It cannot, by itself, prove the contents were never swapped, altered, or stored elsewhere. A torn or resealed package can still be meaningful evidence; it simply requires more cautious wording.
An insert, card, receipt, or inventory note can connect dates and owners to an item. It may be persuasive when it is internally consistent with the object, but it should be reviewed alongside the object rather than standing in for it. A certificate or a scan code is not universal proof of a release, condition, or current item identity.
Photographs from before acquisition can support continuity if they show identifiable details and have credible timing. They are strongest when the same item-specific marks, packaging, and configuration can be seen across images. Generic stock photographs tell you what a release may have looked like; they do not show what is in front of you.
That division of labor is why a good record shows how the figure, presentation, documentation, and source record converge—or fail to converge.
Common identification traps
Treating a broad design family as an exact release
Many visual ideas recur across different sizes, colors, packages, anniversaries, or regional releases. “It looks like a familiar collaboration” is an entry point. It is not an exact configuration. Always finish the search with a scale, package, and label comparison.
Using a low-resolution image to read small text
Image enhancement can make an unreadable label look more legible than it is. It can also introduce false edges or characters. Preserve the original file, use better photography if possible, and transcribe uncertainty honestly.
Assuming packaging and figure have always traveled together
Collectors often preserve boxes separately. Estate collections may combine items for storage. Resellers may use a visually similar carton for protection. Call packaging “present with the item” until you have evidence that it is the intended pairing.
Confusing condition variation with release variation
Yellowing, UV exposure, adhesive residue, surface abrasion, or a replacement bag can alter appearance. The solution is not to ignore condition; it is to document it and compare the underlying design and construction separately. The condition guide linked below handles that question in depth.
Making a conclusion from a keyword-rich listing
Search results can promote the most repeated terminology, not the most careful research. A listing that uses several desired terms may still omit measurements, actual-item photos, source documents, or images of the relevant label. Ask for the missing evidence instead of filling it in.
Ignoring the possibility of a custom or altered piece
Some objects may be repainting projects, custom work, parts combinations, or unknown alterations. Those possibilities do not automatically make an item worthless or uninteresting, but they change the description. The companion custom-versus-fake guide will help readers use accurate language without forcing a binary conclusion.
A practical release-identification checklist
| Stage | Record or action | What it helps establish | What it cannot establish alone |
|---|---|---|---|
| Intake | Photograph every side of the exact figure before handling | What was present and its observed state | A release name or a package relationship |
| Measurement | Note height and configuration | Candidate size class and format | Exact release or condition history |
| Marking log | Transcribe every visible label and marking verbatim | Searchable, reviewable object details | Meaning of an unreadable or unverified string |
| Packaging review | Photograph all panels, labels, seals, inserts, and dimensions | Claimed configuration and presentation evidence | That the box and figure were paired from issue |
| Source search | Compare a release-specific record with a second useful source | Candidate design, scale, or date facts | The identity of your exact object without comparison |
| Object comparison | Match figure and packaging detail by detail | Strength or weakness of the candidate match | Universal verification of provenance or condition |
| Conflict log | Write down every mismatch or unknown | Honest research status and next questions | A reason to dismiss evidence without review |
| Final record | Use documented, probable, unresolved, or mismatch wording | Clear disclosure for a buyer, insurer, or future owner | A guarantee about future price or marketability |
For an in-person purchase, use the same checklist before exchanging money. Gauntlet Gallery is a digital-first gallery, not a public retail storefront. For an in-person purchase, inspect the exact figure and documentation; online, prioritize actual-item photos, release details, condition, and return terms.
When the evidence remains incomplete
An incomplete result is not a failed result. It may tell you precisely what to request: a clear underside photograph, a measurement, an image of the lower box panel, a dated receipt, or a photo of a missing insert. That is considerably better than treating uncertainty as a gap to be filled by confidence.
If an item lacks packaging and its markings cannot be read, your most useful conclusion may be a descriptive identification with a short candidate list. Write: “The figure is consistent with these design characteristics, but the available evidence does not support assigning an exact release.” This protects the next researcher and keeps your own records clean.
Do not alter an item merely to make it easier to identify. Avoid cleaning residue off labels, cutting sealed material, applying heat, polishing surfaces, or opening a package solely for research without understanding the possible condition consequences. If an item is high value to you, unusually fragile, or central to a dispute, seek appropriate specialist advice before intervening.
Once a release is identified well enough for your use, save the record with your acquisition details, condition images, and the date of research. Add new evidence instead of overwriting old conclusions. A collection record that shows how knowledge changed over time is more credible than one that pretends every answer was certain from day one.
Related guides
- How to Authenticate a BE@RBRICK: Complete Verification Guide — use this after you have a release candidate and need an inspection framework.
- BE@RBRICK: Complete Guide to Sizes, Authentication, Value & Where to Buy — use this for broad scale and collecting context rather than release-level documentation.
- BE@RBRICK Condition Grading Before Buying — a future companion for recording wear and packaging state against the identified configuration.
- How to Identify an Older DEATH NYC Print — a parallel research-log workflow for release history and incomplete records.
- Contextual CTA, verify before publication: browse current BE@RBRICK listings only when actual-item photos and release details are available for the specific item you are considering.
FAQs
Can a box alone identify my BE@RBRICK?
A box may narrow the candidate release through its label, dimensions, and stated configuration, but it does not by itself establish what is inside or whether it originally traveled with the figure. Document the box and the figure separately, then compare both to release-specific sources.
What photos should I request from a seller?
Ask for actual-item photos of the front, back, both sides, feet or underside, joints, close-ups of visible markings, every box panel, labels, inserts, and any condition issue. Ask for a measured height and a photo of the item with its packaging if they are being sold together.
Is a barcode or product number enough to prove the release?
No. It can be a valuable lead when transcribed accurately and matched to a reliable release record, but a label can be unreadable, misplaced, reproduced, or attached to packaging not paired with the figure. Use it as one part of a larger match.
What if my figure matches the design but not the expected box?
Record the figure and box as separate findings. The figure may have been sold loose, the box may be from another configuration, or one part of the candidate match may be wrong. Do not describe them as an original set until compatible evidence supports it.
Should I open a sealed package to identify it?
Not automatically. Opening can change condition and removes evidence about how the item arrived. First photograph every exterior detail and research the label and configuration. If opening is necessary for a defined purpose, weigh the condition consequence and preserve the process with photos.
Source notes and limitations
- Manufacturer and retailer release pages, availability, package configurations, and regional distribution may change or be removed. Recheck first-party sources and current retailer terms before relying on them for a transaction.
- Secondary-market listings are useful comparison material but may repeat older errors. They should not be the only source for an exact-release conclusion.
- This guide is educational and does not provide a guarantee of identity, condition, provenance, market value, availability, or return outcome. It does not replace specialist inspection for a specific object.
- The existing Gauntlet URLs in this draft returned live article pages when checked on August 6, 2026. The collection CTA should be reverified for inventory and availability before publication.